

Imagine yourself as a master weaver, effortlessly intertwining strands of hair to create beautiful braids. In this How to braid hair for Beginners article, we will guide you through nine easy tutorials on the basics of braiding and on how to braid like a pro.
Whether you’re looking for a classic three-strand braid, a ponytail braid, how to braid cornrows, or want to try your hand at intricate styles like the French or Dutch braid, we’ve got you covered.
Get ready to transform your hair into stunning works of art with these step-by-step instructions. Let’s dive in and unleash your inner braiding artist!
Basic Three-Strand Braid
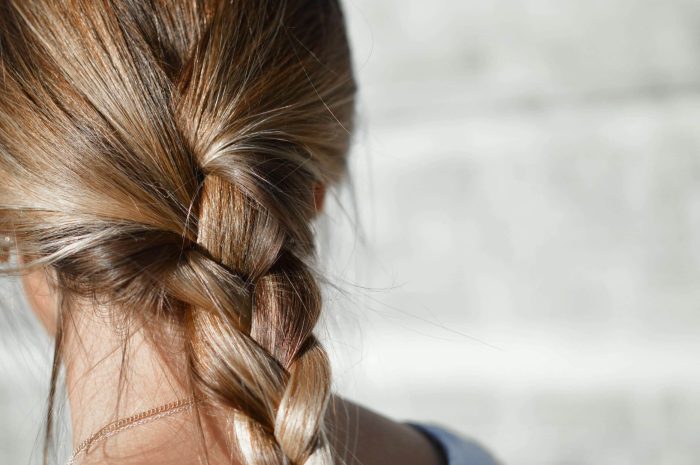
Let’s start by learning the basic, regular braid – the three-strand braid. This is a simple and classic hairstyle that can be done on any hair type or length. To begin, comb your relaxed hair to remove any tangles and divide it into three equal sections. Hold one section with your left hand, another with your right hand, and leave the third section in the middle. Use your fingers to keep each section separate.
To create a braided hairstyle, divide your hair into three sections and cross the left section over the middle section. Next, move the right section across the new middle section. Continue this process until you reach the end of your hair. It is necessary to cross each outer section over the middle one.
Once you have reached the end of your hair, secure it with an elastic band or a ribbon. Congratulations! You have successfully created a regular three-strand braid. With practice, you can create various hairstyles using this technique such as braided ponytails or updos.
Source: (wikihow.com)
French Braid
The French braid is a versatile hairstyle that is a very easy braid for beginners. It is a beautiful and intricate way to style your hair, perfect for any occasion.
This is the best way on how to braid a French braid, one can start by dividing the hair into three equal sections. Then, the middle strand can be held between the thumb and index finger of one hand, while the left strand is held between the thumb and index finger of the other hand. Next, the left strand can be crossed over the middle strand, thus making it the new middle strand. Next, include a small section of hair from the right side into the newly formed middle strand.
Repeat this process on the other side by crossing the right strand over the middle strand, adding a small piece of hair from the left side each time. Continue braiding in this manner until you reach the ends of your hair. Secure your new braid with hairspray to keep it in place.
Congratulations! You have successfully created a French braid, a stylish and elegant braided hairstyle that will turn heads wherever you go. Practice makes perfect, so keep experimenting with different sections of hair and variations to master this classic style!
Dutch Braid

Creating a Dutch braid is a stylish way to elevate your hair game without much effort. This trendy hairstyle works well on both dry and natural hair, making it versatile for any occasion. Follow these simple steps on how to braid the perfect Dutch braid:
- To begin, separate a small portion of hair at the top into three equal sections.
- Begin by crossing the right strand under the middle strand, followed by crossing the left strand under the new middle strand.
- As you continue braiding downwards, add small sections of hair from each side, crossing them under towards the middle.
- Repeat this process until you reach the nape of your neck or desired length.
- Secure the end with a rubber band or bobby pin.
A Dutch braid is not only a fashionable choice but also serves as a protective style for your strands of hair. It keeps them neatly in place while preventing breakage and frizz. Celebrity hairstylists often incorporate this technique to create stunning updos or half-up hairstyles.
The Dutch braid is similar to French braiding, but instead of crossing sections over, you cross them under for an inverted effect. Mastering this classic three-strand braid will give you endless options for beautiful hairstyles that are sure to turn heads wherever you go!
Fishtail Braid
To create a fishtail braid, divide your hair into two equal sections. This style works well for all hair types, regardless of length or texture. Follow these steps on how to braid a beautiful fishtail braid.
- Take a small section of hair from one side and cross it over to the other side.
- Repeat this step with a small section from the other side, crossing it over to the first section.
- Continue alternating sides, taking small pieces of hair and crossing them over until you reach the end.
The key to creating a clean and polished fishtail braid is to maintain clean sections and keep your grip tight on each strand of hair. Use bobby pins if needed to secure any loose pieces of hair along the way.
Rope Braid

For a stylish and versatile hairstyle, try the rope braid. This simple three-strand braid is perfect for any occasion, whether you’re running errands or going to a fancy event.
Here’s how to achieve this neater braid:
- Start by brushing your hair to remove any tangles or knots.
- Divide your hair into two equal sections.
- Take one section and twist it clockwise until it starts to coil on itself.
- Hold onto the twisted section with one hand while using the other hand to twist the second section in the opposite direction (counterclockwise).
- Once both sections are twisted, bring them together and cross the right section over the left section.
- Continue twisting and crossing until you reach the end of your hair.
- Secure with an elastic band.
The best thing about the rope braid is that it works well on all hair types and lengths, making it a go-to option for anyone looking for a boho-style braid that can be worn every day or dressed up for special occasions.
If you want to take your rope braid to the next level, try incorporating elements from other braided styles like the waterfall braid or advanced waterfall braid for a thicker and more intricate look.
Waterfall Braid
The waterfall braid adds an elegant touch to any hairstyle, making it a popular choice for weddings and formal events. This beautiful style creates the illusion of strands cascading down like a waterfall, hence its name. It’s a versatile braid that can be incorporated into various hairstyles, such as crown braids or accent braids.
To achieve this stunning look, start with a traditional braid and then incorporate the waterfall technique. Here’s how you can create a waterfall braid:
- Begin by parting your hair in the center and dividing it into two sections.
- Take a small section of hair from the top of one side and divide it into three equal parts.
- Cross the right strand over the middle strand, then cross the left strand over the new middle strand.
- Drop the right strand and pick up a new section of hair next to it.
- Continue braiding by crossing the left strand over the middle strand and dropping the right strand each time you add new hair.
By following this step-by-step guide, you’ll create a balanced braid that looks intricate yet effortless. Don’t worry if you’re new to braiding; this beginner-friendly French braid is perfect for practicing your skills while creating a stunning hairstyle.
No matter which braid type you choose, remember to keep your hands steady and use a comb to keep the braid smooth. With practice, you’ll be able to create stunning hairstyles that turn heads at any event.
Boxer or Box Braids

Creating boxer braids is a trendy way to style your hair without much effort. If you’re new to braiding, don’t worry! With a little practice, you’ll be rocking the perfect box braids in no time. Here’s how:
- Start by parting your hair down the middle to create two equal sections.
- Take one section and divide it into three smaller sections.
- Begin your Dutch braid by crossing the right section under the middle section, then cross the left section under the new middle section.
- Continue crossing the side sections under the middle section while adding small sections of hair from each side as you go.
- Keep braiding until you reach the nape of your neck and secure it with an elastic band or butterfly clip.
- Repeat on the other side, following steps 2-5.
Tips for mastering your boxer braid game:
- To keep your braids neat, make sure to consistently take equal-sized sections of hair.
- Experiment with different styling options once you’ve mastered basic box braids; try adding a bit of hair oil or incorporating twists into your braid styles.
- Don’t be afraid to sleep with your braids in! Taking your braids to bed can help train them and make them last longer.
With some practice and patience, your braiding skills will be on par with an expert. You’ll soon become a pro at how to braid stylish boxer braids that are perfect for any occasion!
Source: (mindbodygreen.com)
Halo Braid
If you’re looking for a versatile and elegant hairstyle, the halo braid is an awesome braid option. This delicate braid gives you a regal and sophisticated look, perfect for any occasion. Whether you’re a braid expert or new to braiding, you can easily learn how to braid this gorgeous style in just a few simple steps.
First, comb your hair to ensure it is tangle-free. Use a wide tooth comb to brush through your locks gently. Begin by collecting the hair sections nearest to your face and initiating a conventional braid. Incorporate additional hair from the sides as you progress with the braid until you reach the back of your head.
To secure the braid, use an elastic band. Create volume by gently pulling on the edges of the braid. Wrap the end of the braid around your head like a halo and secure it with bobby pins.
Now that you’ve mastered this beautiful hairstyle, let your halo braid become the centerpiece of any outfit or event.
Crown Braid

To achieve the elegant and regal look of a crown braid, start by combing your hair and gathering the middle sections closest to your face. Follow these simple steps to create a stunning crown braid:
- Divide your hair into two equal sections: Take one section from each side of your head and separate them in the middle.
- To begin braiding, cross the right strand over the left strand and continue braiding until you reach the ends of your hair.
- Create a crown effect: Once both sections are braided, bring them behind your head and secure them together using hair ties. You can also use bobby pins for extra hold.
- To enhance your crown braid, try to incorporate a braid train. This is simply adding delicate strands into a large single braid. This gives you the one-two punch of a crown braid along with a cascading middle piece.
To enhance the look of your crown braid, consider using styling paste or hair oil to add shine and smoothness. If you want to make it more voluminous, try adding some hair extensions before starting the braid.
Remember to keep your hair tangle-free before starting the braid by gently brushing or finger-combing through it. For additional guidance on how to braid, there are plenty of online tutorials available that provide step-by-step instructions on how to create a flawless crown braid. Even if you are learning how to braid hair for men.
With these tips and techniques, you’ll be able to rock a beautiful crown braid that will turn heads wherever you go!
Source: (instyle.com)
Frequently Asked Questions for How to Braid
How Long Should My Hair Be to Create These Braided Hairstyles?
Your hair should be long enough to create these braided hairstyles. The length will depend on the specific tutorial, but generally, shoulder-length or longer hair works best for most braiding styles.
Can I Use Hair Extensions to Make My Braids Look Longer or Fuller?
Yes, you can use hair extensions to make your braids look longer or fuller. They are a great way to add length and volume to your hair for braided hairstyles.
What Type of Hair Products Should I Use to Keep My Braids in Place?
To keep your braids in place, use hair products like hairspray or styling gel. These products will help hold your braids and prevent them from unraveling throughout the day.
Can I Create These Braided Hairstyles on Curly or Textured Hair?
Yes, you can create these braided hairstyles on curly or textured hair! Embrace your natural hair and let it shine through the intricate braids. Follow the tutorials for easy step-by-step instructions.
How Can I Prevent My Braids From Unraveling or Becoming Loose Throughout the Day?
To prevent your braids from unraveling or becoming loose throughout the day, make sure to secure them tightly at the beginning. Use small elastics or bobby pins to reinforce the ends, and consider using a holding spray for extra hold.
Source: (glamour.com)
Conclusion

So there you have it, 9 easy tutorials on how to braid your hair.
From the basic three-strand braid to more intricate styles like the halo braid and crown braid, these how to braid tutorials will help you achieve any look you desire.
Remember, practice makes perfect, so don’t be discouraged if your first attempts aren’t perfect.
As the old saying goes, ‘Rome wasn’t built in a day.’
Keep trying and soon enough you’ll be a braiding pro!