

Did you know that over 70% of people wish they knew how to French braid their hair?
Well, good news! In just 6 easy steps, you’ll be able to master the art of French braiding and achieve that elegant look you’ve always wanted.
With our step-by-step guide and helpful tips, we’ll guide you through the process from start to finish.
So grab your comb and get ready to transform your hairstyle with this classic technique. You’re about to become a braiding pro!
Gathering the Necessary Tools and Materials
You’ll need a comb, hair elastics, and bobby pins to get started.
French braids are a versatile hairstyle that can be worn for any occasion. They’re perfect for keeping your hair out of your face while still looking stylish.
To begin, divide your hair into three equal sections at the center of your head. Hold one section with two fingers from each hand and cross it over the middle section, then pull it tight. Repeat this technique with the other side, crossing it over the middle section as well.
Continue alternating sides and adding small sections of hair until you reach the nape of your neck. Secure the end with a hair elastic or bobby pin to prevent unraveling.
To achieve different styles, you can create multiple French braids or incorporate knots along the way.
Once finished, you can use hairspray to keep everything in place throughout the day.
With a little practice and patience, you’ll soon master this classic hairstyle that never goes out of fashion!
Understanding the Basic Technique of French Braiding
Once you’ve grasped the basic technique, it’s important to understand how to section your hair for a French braid. This process will help ensure that your braid looks neat and tidy.
To start, make sure your hair is detangled and free of any knots or tangles. If you have dry hair then dampen it slightly, as this will make it easier to work with. Next, comb through your damp hair to distribute the moisture evenly and create a smooth texture.
To begin the sectioning process, divide your hair into three equal sections: the middle strand, the left strand, and the right strand. Use hair elastics or small elastic bands to secure the two sections you’re not working with at that moment.
Now you’re ready to begin braiding! Take a small section of hair from near your forehead and split it into three equal strands – this will be your starting point. Cross the left strand over the middle strand, then cross the right strand over what is now the new middle strand. Repeat this process by adding more hair to each side as you continue down your head.
Remember to keep tension on each strand as you go along and try not to let any loose strands slip out of place. Continue braiding until you reach the end of your hair and secure it with another elastic band.
With these step-by-step instructions in mind, you’ll be able to effortlessly section your hair for a beautiful French braid every time!
Source: (beautymone.com)
Simple Steps for Creating the Initial Section
To start creating the initial section, make sure your hair is detangled and free of any knots or tangles. This is important because it will make the process much easier and smoother.
Now, let’s dive into the step-by-step instructions for creating the initial section of your French braid.
Step 1: Start by dividing a small piece of hair at the top of your head. This will be the starting point for your braid.
Step 2: Divide this small piece into three equal strands – left, middle, and right.
Step 3: Cross the left strand over the middle strand, then cross the right strand over the new middle strand. Repeat this motion once to create a basic braid foundation.
Step 4: With every new cross-over motion, add a small piece of hair from each side to each respective strand. This will gradually incorporate more hair into your braid as you move along.
Step 5: Continue this pattern down towards the nape of your neck until all your hair strands are incorporated into the braid.
Step 6: Once you reach the end, secure it with an elastic band or a decorative clip to complete your beautiful French braided hairstyle.
Adding in Additional Hair Strands While Braiding

As you continue braiding, remember to incorporate small pieces of hair from each side with every cross-over motion. This technique is essential for creating a French braid that looks neat and polished. By adding additional strands of hair while braiding, you can achieve a beautiful and intricate hairstyle.
By following these steps and incorporating small pieces of hair as you go along, your French braid will become more secure and visually appealing. Remember to keep each cross-over motion tight for a clean finish.
Now that you know how to add in additional strands while braiding, get ready to impress others with your skillful braiding technique!
Source: (pigtailsandcrewcuts.com)
Tips for Maintaining Tension and Keeping the Braid Neat
Maintaining tension and keeping your braid neat is crucial for a polished look. When it comes to the French braiding process, there are a few tips that will help you achieve this desired outcome.
First, make sure you have the right tension throughout the entire process. This means pulling firmly on each section of the hair as you weave it into the braid, ensuring that it stays in place and doesn’t come loose.
To keep your braid neat, take the time to carefully divide your hair into three equal sections at the beginning. This will create a solid foundation for your braid and prevent any messy or uneven sections from forming later on. As you continue braiding, be mindful of any stray hairs that may pop out or become tangled. Use your fingers to smooth them back into place and incorporate them seamlessly into the braid.
In addition to maintaining tension and keeping things neat, there are a few other steps you can follow to ensure a successful French braid. Start by brushing through your hair to remove any tangles or knots. Then, dampen it slightly with water or use some styling product or a bit of hairspray for better control.
Finishing the Braid and Securing It With a Hair Tie
Once you reach the end of the French braid, secure it with a hair tie to keep everything in place. Follow these steps to finish the braid and secure it properly:
- Hair ties – Choose a hair tie that matches your hair color or opt for a clear one for a seamless look.
- Gather all the remaining hair sections – Bring together all the loose strands of hair that are not yet incorporated into the braid.
- Secure with the hair tie – Wrap the hair tie around all the gathered sections at least two times to ensure it stays in place.
By securing your French braid with a hair tie, you’ll prevent any unruly strands from coming loose and maintain an elegant and polished look throughout your day. This step is crucial as it keeps your hard work intact, ensuring that your hairstyle lasts longer without needing constant readjustment or touch-ups.
Source: (ogleschool.edu)
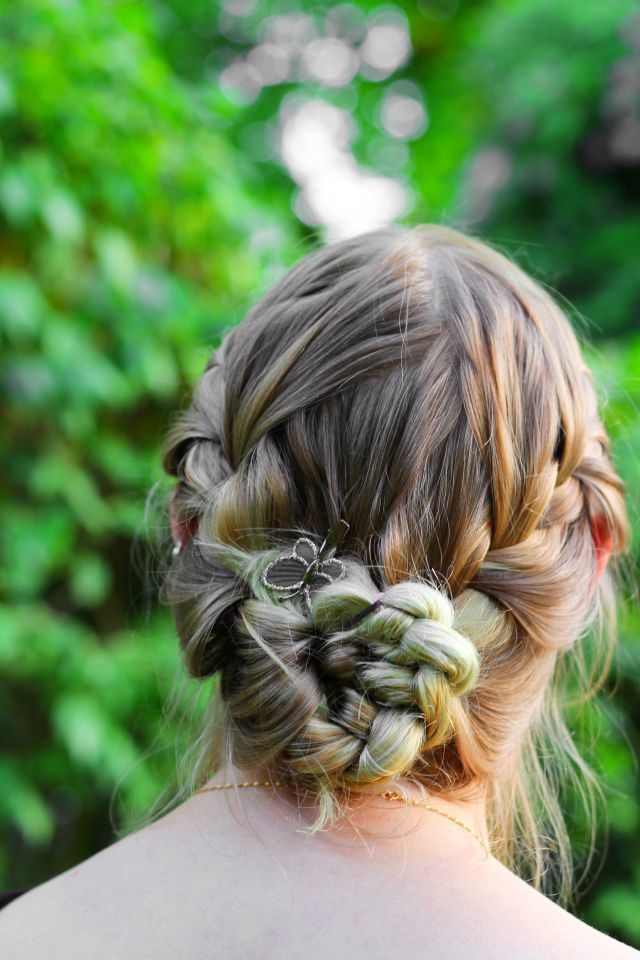
Styling Options and Variations for French Braids

Now that you know how to finish your French braid and secure it with a hair tie, let’s talk about the various styling options and variations you can try with this classic hairstyle.
The beauty of a French braid is that it provides a solid foundation for many different looks. Another tutorial for how to braid is right here. Check it out.
One simple option is to gather the rest of your hair into a ponytail after completing the braid. This creates an elegant and polished look suitable for any occasion. If you prefer a more playful style, consider dividing your hair into two sections and creating pigtails with your French braids.
For those looking to make a statement, double braids are an excellent choice. Simply create two separate French braids on each side of your head, weaving them tightly from top to bottom. This look is both trendy and practical, keeping your hair out of your face while still looking stylish.
To add some texture to your French braid, gently tug on the strands once you’ve tied them off with a rubber band. This will create loose waves throughout the length of the braid. You can also enhance the overall look by adding decorative hair clips or accessories along the braided pattern.
With these styling options and variations, there’s no limit to how you can rock your French braid!
Source: (byrdie.com)
Troubleshooting Common Issues and Mistakes
If you’re struggling with keeping the braid tight, try using smaller sections of hair while braiding. This can help you gain more control over your French braid and prevent it from becoming loose or messy.
Here are three troubleshooting tips to help you attain that perfect braid and improve your French braiding skills:
- Tackle slippery strands: If your hair is silky or prone to slipping out of the braid, try spraying some texturizing spray or dry shampoo on your hair before starting. This will add grip and make it easier to manage.
- Avoid larger sections: When braiding, it’s tempting to grab large sections of hair for a quicker process. However, this can lead to flyaways and an overall untidy appearance. Instead, opt for smaller sections that allow for better control and neater results.
- Tame those flyaways: Flyaways can be frustrating when trying to achieve a sleek look with your French braid. To combat this issue, use a small amount of styling gel or hairspray on your fingertips and gently smooth down any stray hairs along the way.
Frequently Asked Questions on How to French Braid
How Long Does My Hair Need to Be in Order to French Braid It?
To French braid your hair, it needs to be long enough to grip securely. A good rule of thumb is shoulder-length or longer. This will ensure that the braids hold together and look neat.
Can I French Braid My Own Hair, or Do I Need Someone Else to Do It for Me?
You can definitely French braid your own hair! It may take a little practice, but with patience and the right technique, you’ll be able to master it. Don’t be afraid to give it a try!
Can I French Braid My Hair if It’s Curly or Wavy?
Yes, you can learn how to French braid your hair if your hair is curly or wavy. It may require some extra preparation like using styling products or straightening beforehand, but with practice and patience, you can achieve a beautiful French braid.
How Long Does It Usually Take to Learn How to French Braid?
It usually takes some practice and patience to learn how to French braid. But don’t worry, with a little effort, you’ll be able to master it! Keep trying and soon you’ll be braiding like a pro.
Will French Braiding My Hair Damage It in Any Way?
French braiding your hair will not damage it if done correctly. It’s important to be gentle and avoid pulling too tight. Regularly moisturizing and protecting your hair will also help maintain its health while braided.
Conclusion

Congratulations! You’ve mastered the art of creating your own, unique French braid hairstyle in just six easy steps.
By gathering your tools and materials, understanding the technique, and following our step-by-step tutorial, you can create a stunning French braid with ease.
So go ahead, unleash your inner hairstylist, and let your creativity shine through different styling options and variations.
Remember, practice makes perfect, so embrace any troubleshooting challenges that may arise along the way. For more guides to learn how to French braid your own hair, or your kid’s braids hair go here.
Now go forth and rock that beautifully crafted French braid like a pro!